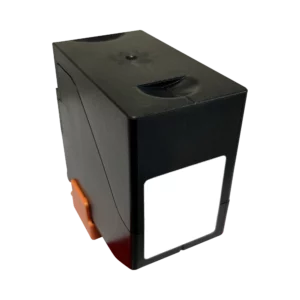
Ready to get your Quadient iX3 franking machine up and running with a fresh ink cartridge? You’re in the right place! Installing a new ink cartridge might seem daunting, but with this friendly guide, you’ll be a pro in no time. Plus, we’ll sprinkle in some troubleshooting tips to ensure smooth sailing. So, let’s dive in!
Step-by-Step Guide to Installing Your Quadient iX3 Ink Cartridge
Get Ready to Install
First things first, gather your Quadient iX3 ink cartridge. We’re about to bring your franking machine back to life with vibrant ink that makes every mail piece stand out.
1. Open the Machine Cover
Gently lift the cover of your Quadient iX3 to access the heart of the machine where the ink cartridge lives. This is where the magic begins!

2. Insert the Ink Cartridge
Now, take your ink cartridge . You’ll notice ‘TOP’ and ‘LOCK’ stickers – these are your guides to ensuring the cartridge goes in the right way. Hold the cartridge at an angle, with these stickers facing upwards.
Carefully slide the cartridge towards the back of the machine until you hear a satisfying ‘click’. That sound is music to our ears – it means the cartridge is securely in place and ready to go.
3. Close the Cover
With the ink cartridge installed, close the machine cover. You’re almost ready to start franking!
4. Power On and Test
Turn on your Quadient iX3 using the switch near the power cable and follow any on-screen setup instructions. It’s a good idea to run a test print to ensure the ink flows beautifully and everything is working as it should.
Troubleshooting Tips
Encountered a hiccup? No worries, here are some tips to get you back on track:
-
- The Machine Doesn’t Recognize the Cartridge: Double-check that the cartridge clicked into place. If it’s not fully inserted, the machine won’t recognize it. Reinsert it, making sure you hear that ‘click’.
-
- Ink Quality Issues: If your first few prints are looking a bit off, give it a moment. Sometimes, it takes a few prints for the ink to flow smoothly. If the issue persists, ensure there’s no packaging material obstructing the cartridge.
-
- Leaking Ink: It’s rare, but if you notice ink leakage, power off the machine immediately and carefully remove the cartridge. Check for any damage to the cartridge and clean up any spilled ink with a damp cloth. When in doubt, contact Link Mailing Systems support for assistance.
Wrapping Up
Installing an ink cartridge in your Quadient iX3 shouldn’t be a chore. With this guide, you’re well-equipped to handle it like a champ. Remember, a well-maintained franking machine means hassle-free mailing and packages that reach their destinations with a professional touch.
Got more questions or need further assistance? Don’t hesitate to reach out to our customer support team. They’re always ready to help ensure your mailing operations run smoothly.
Happy franking, and here’s to all your future mail endeavors being as smooth and efficient as your freshly inked prints!
