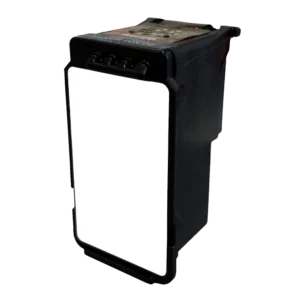
Hey there, fellow mailing enthusiasts! Are you ready to get your Pitney Bowes SendPro Mailstation up and running? Great! Today, I’m here to walk you through a super simple process: installing your franking ink cartridge and running a test pattern. Let’s make this as smooth as a freshly sealed envelope!
Step 1: Unbox and Prep Your Ink Cartridge
First things first, let’s get that shiny new ink cartridge out of its box. Once you have it in hand, you’ll notice an orange sticker on the bottom. This little sticker is there to protect your cartridge during transport, but now it’s time to say goodbye. Gently peel it off and voila, your cartridge is ready for action!
Step 2: Open Sesame, Ink Door!
Next up, locate the ink door on your SendPro Mailstation. Found it? Great! Gently open the door to reveal the slot where your ink cartridge will call home. This is where the magic begins.
Step 3: Cartridge, Meet Mailstation
Now, take your cartridge and introduce it to its new home. Slide it in at an upward angle, then give it a firm but gentle push upwards until you hear a satisfying click. That click means “perfect fit” in cartridge language.

Step 4: Seal the Deal
With your cartridge securely in place, it’s time to close the ink door. A little nudge should do it—just like closing a book after a good read.
Step 5: Let’s Test This Out!
On your Mailstation display, tap ‘Continue’ to move on to the next step. You’ll see an option to ‘Create a Test Print’. This is your cue to grab an envelope or a tape sheet and gently insert it into the slot, making sure it’s all the way in at the back and right side. The device will then lovingly clamp your envelope and start printing postage. You’ll know it’s working when you see the power button flashing like a mini lighthouse.
Step 6: The Moment of Truth
After the envelope gracefully exits the device, it’s time for a little comparison game. Take a look at the printed test pattern on the envelope and compare it with the examples on the screen. If everything looks as it should, give yourself a pat on the back and tap ‘Good Test Print’ on the display.
Step 7: Continue on Your Merry Way
With a successful test print under your belt, tap ‘Continue’ and bask in the glory of a job well done.
And there you have it, folks! Your Pitney Bowes SendPro Mailstation is now primed and ready to tackle all your mailing needs. Wasn’t that a breeze? Now, you’re all set to send your mail off into the world with confidence. Happy mailing!
Upgrade Your Mailing Experience Now! 🌟 Click Here to Buy Our Premium Mailstation Cartridges! Fast, Reliable, and Engineered for Excellence. Transform Your Mailroom Today. Don’t Miss Out on Unmatched Quality and Efficiency. Shop Now!
